
Introduction to Web Booking v1
Getting access and logging in to CIS Web booking
Logging In
To be able to use the Web Booking system, you need a user account. On the initial web page of the site, the first dialog that meets you is the login dialog (#1).
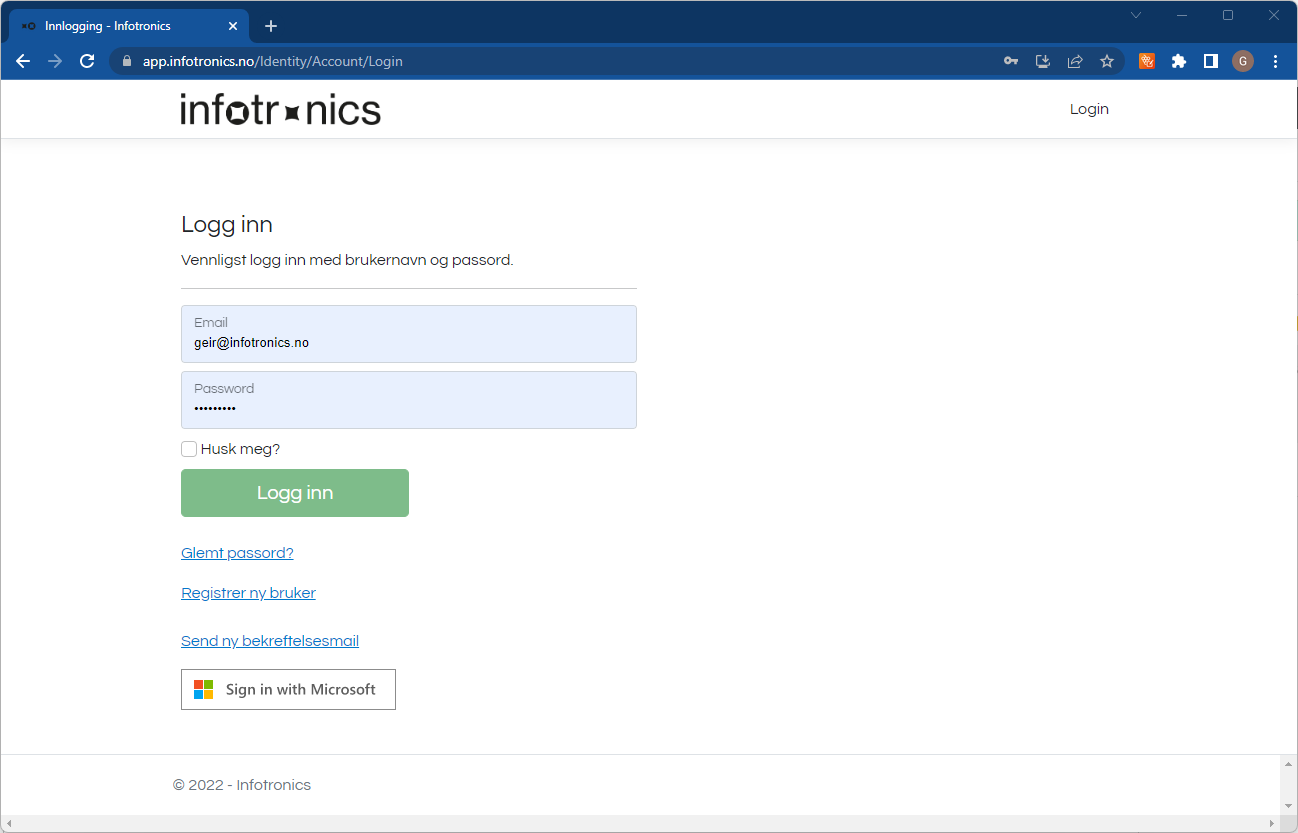
If you already have a user account, you can fill in your Username (E-mail address) and Password, and click the Log In button or press Enter on your keyboard.
Lost password
If you lost your password, you can recover it by clicking in Recover password (#3).
Creating a new user
Important: If someone in your organization already has an account and is an administrator, he/she can create a user account for you directly. You should contact the administrator in your organization to create your user, and the next steps are not necessary.
If your organization does not already have an account, follow the steps below to create one:
1. Each customer site in CIS has a specific URL from which you apply for a new account. You will need to contact the site owner to get the correct URL that you want to apply for. The URL is on the format
https://app.infotronics.no/Identity/Account/RegisterWebBooking/{specificSiteId}.
The form below is displayed and must be filled out:
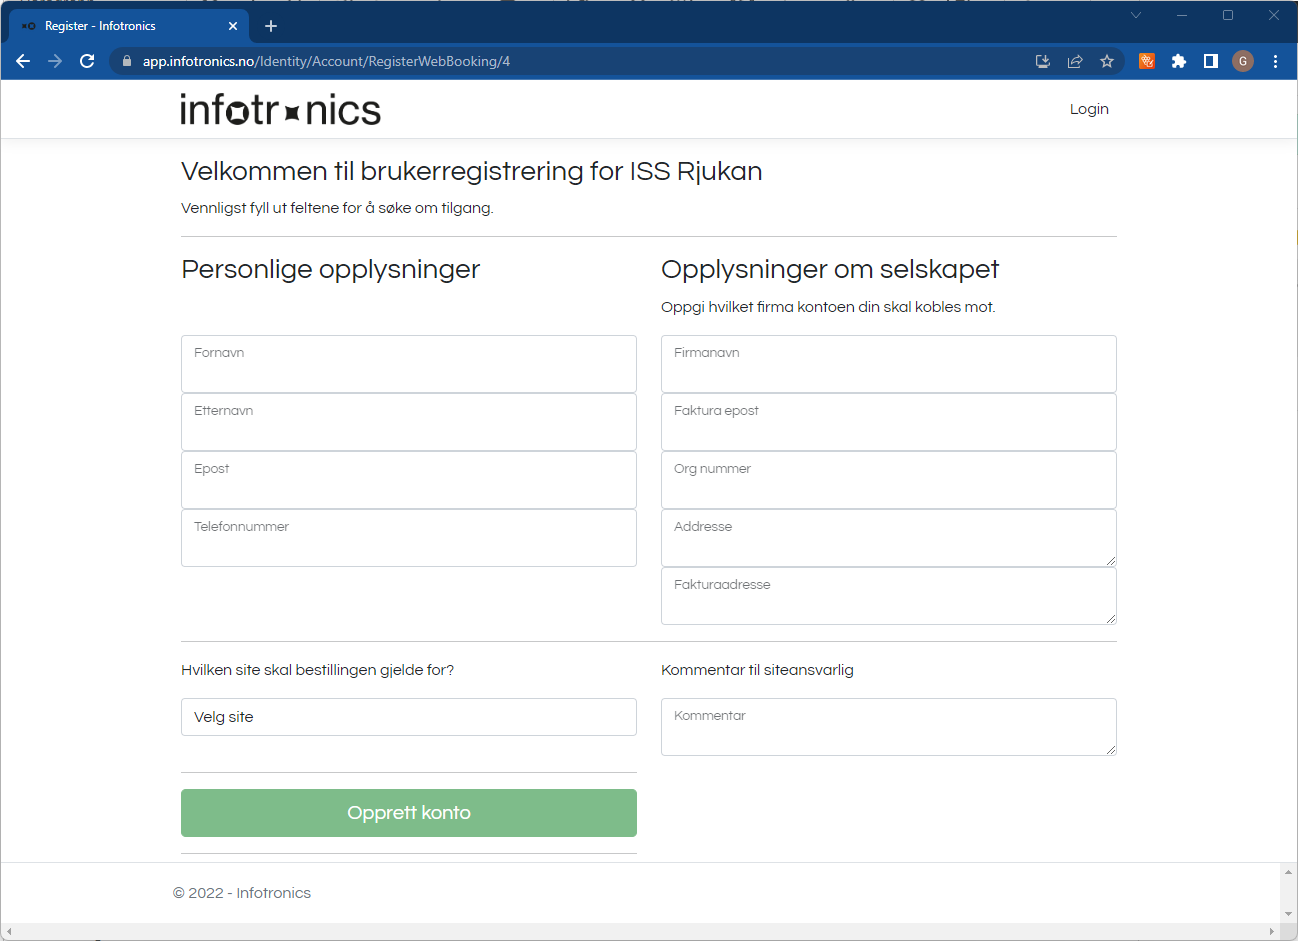
2. You must choose a site where you want the application to be sent, and click Opprett konto button (#1).
3. An E-mail will be sent to the given site/reception. Your information will be stored waiting for the approval, and you will receive an E-mail with your login information when the application is approved.
Working with reservations
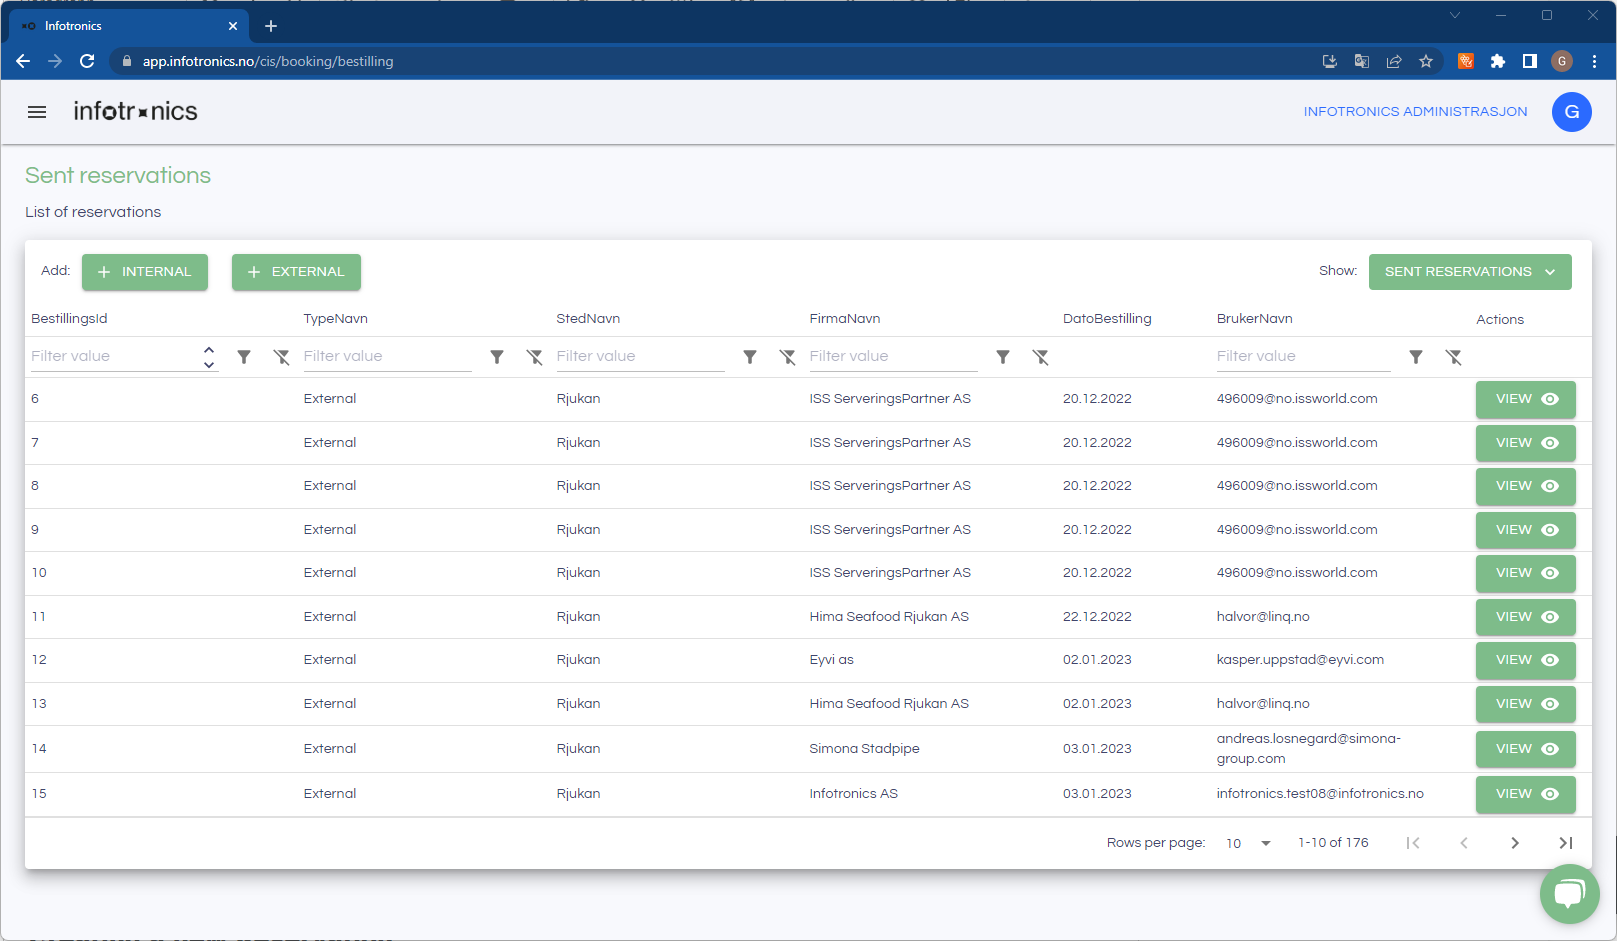
Lists of reservation Page
After login, the list of your company’s open reservations will be shown. By default the last 10 open reservations are displayed. To see older ones, click on the navigation panel (1) at the bottom of the table. In this panel you can move page by page, or go to the first or last page, and you can decide how many records you would like to see in the list by clicking in the dropdown box. In the panel you can also see the current number of open reservations and you can see the total amount of them.
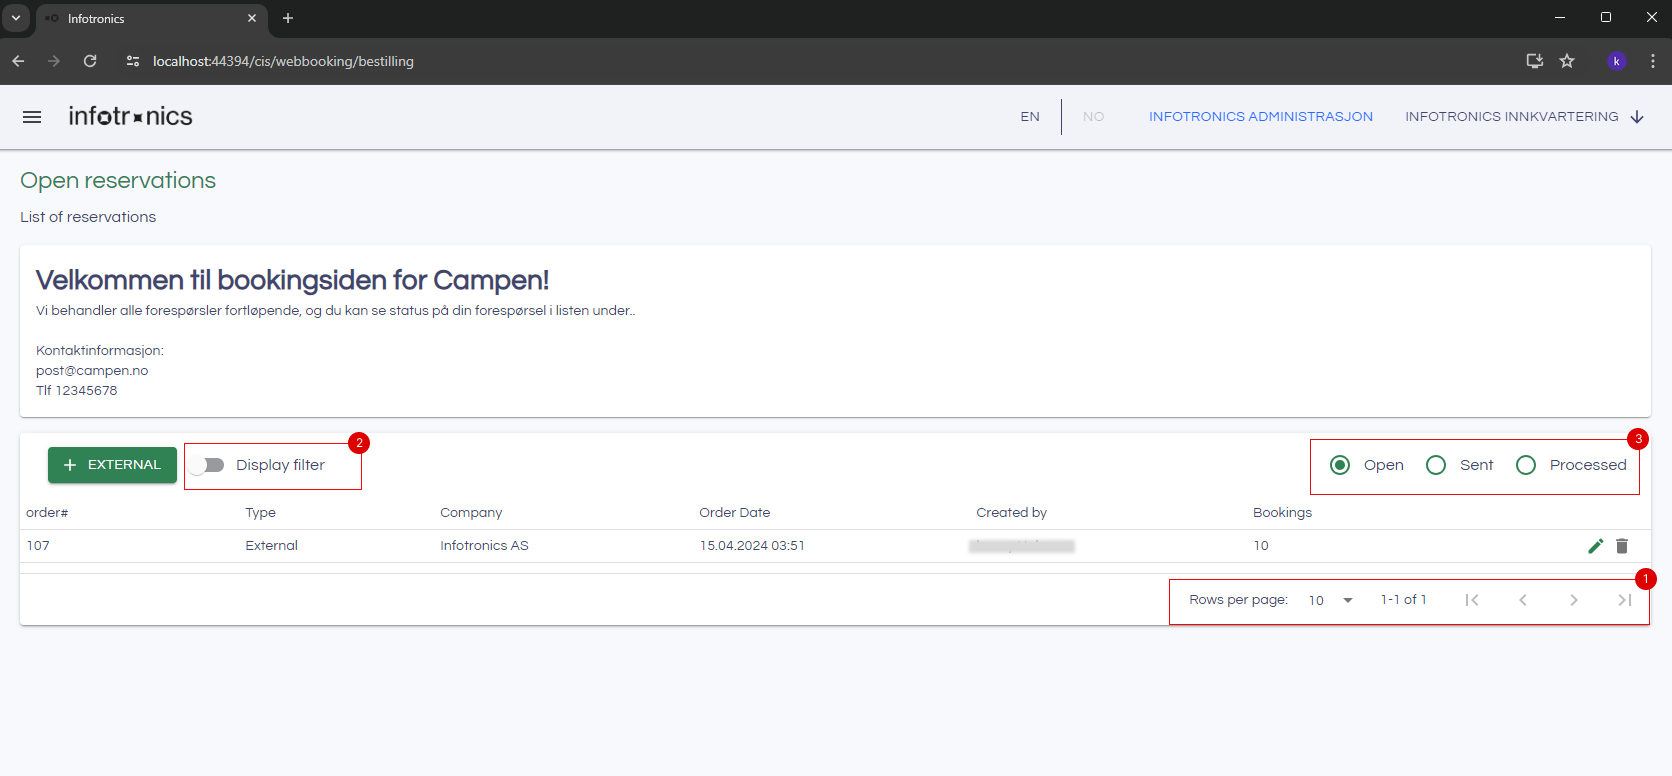
The list can be filtered to display the filter options press the switch "display filter"(2)
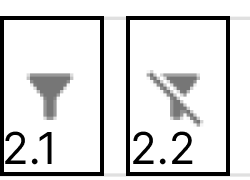
On this bar, you can enter filter text to filter your reservations. To clear the information in the filter box and reset the filter, you click the icon shown in (2.2) Also, the list can be sorted (ascending or descending), by clicking the column headers.
Switching between Open and Sent reservations
Clicking the open reservations button (3) will give you two options open reservations and sent reservations (1.1) The button(1) and the heading(2) will change name depending on what list is currently showing.
Sent Reservations
Sent reservations can not be edited or deleted - the actions button is replaced by a view button(1). Clicking the view button will take you to the reservation where you can see all the relevant information.
Creating a new Reservation
To make a new reservation request, click the Internal button , – if you want to register an internal reservation - or External button – if you want to register an external one -. Depending on your user configuration, you might have access to both or only one of these buttons. If there are some previous reservations, whether you clicked on Internal or External, a dialog will be opened and you will be asked to confirm that you want to create a new reservation.
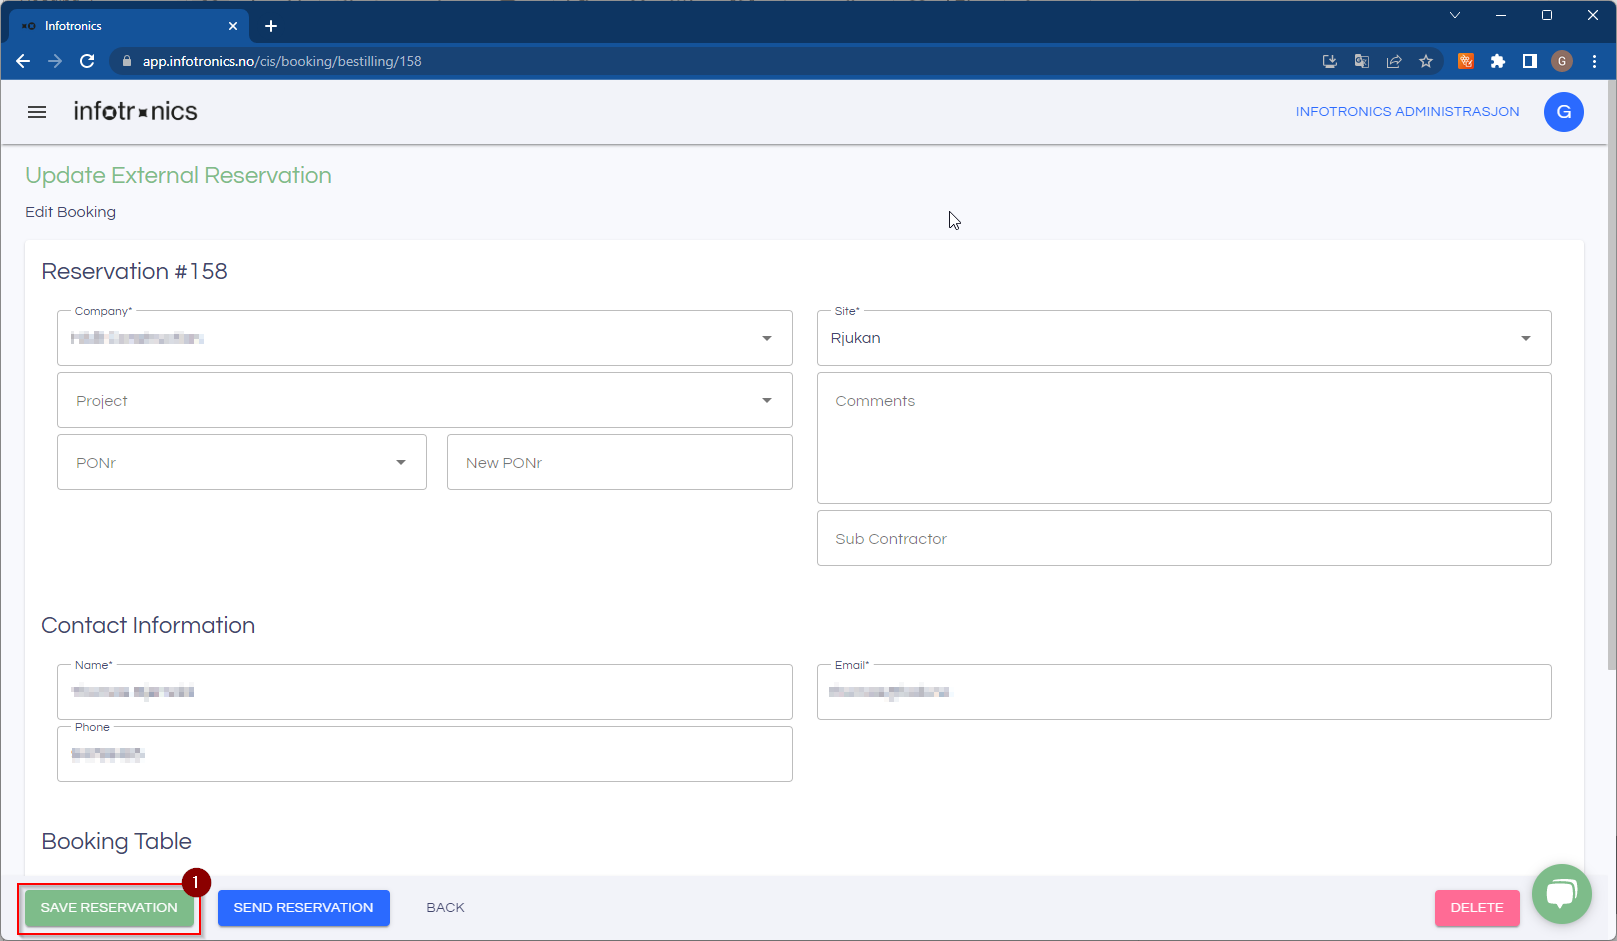
New/Edit Reservation Page
On this page, you will enter information about the new (external/internal) booking. Fields marked with "*" are required to create/save the reservation. Changes are saved by clicking the Save button (1), or cancelled by clicking Cancel.
[Note] reservations made but with no information will stay in the reservation list until they are deleted manually.
Booking Table
In the Booking Table you can Add, Copy and Delete a Person by clicking the corresponding button. If you add a person - by clicking on the Add Person button-, you will have a new row in the table with some fields to be filled. (The Last and First name, Employee Email, and the Date From and Date To are required). You can copy or delete one or more persons by clicking first in the checkbox of the person (or persons) to be copied, and then click on the Copy Person or Delete Person button.
Selections and information under the Booking table header (From, To, Shift, Gender, Nationality) are used as presets when adding a new person. This ensures efficient registrations of persons (only their Name and Email information must be added). Also, the presets can be used to bulk update persons already in the table: Enter the information to update (e.g a new From date) and click the All, Selected or Unselected buttons to bulk update the corresponding rows in the booking table.
[Note] the copy and delete buttons are deactivated until you select at least one person with the checkbox as shown in the third picture below.
If you want to select all the persons in the table, you can click in the checkbox to check or uncheck all the rows of the table.
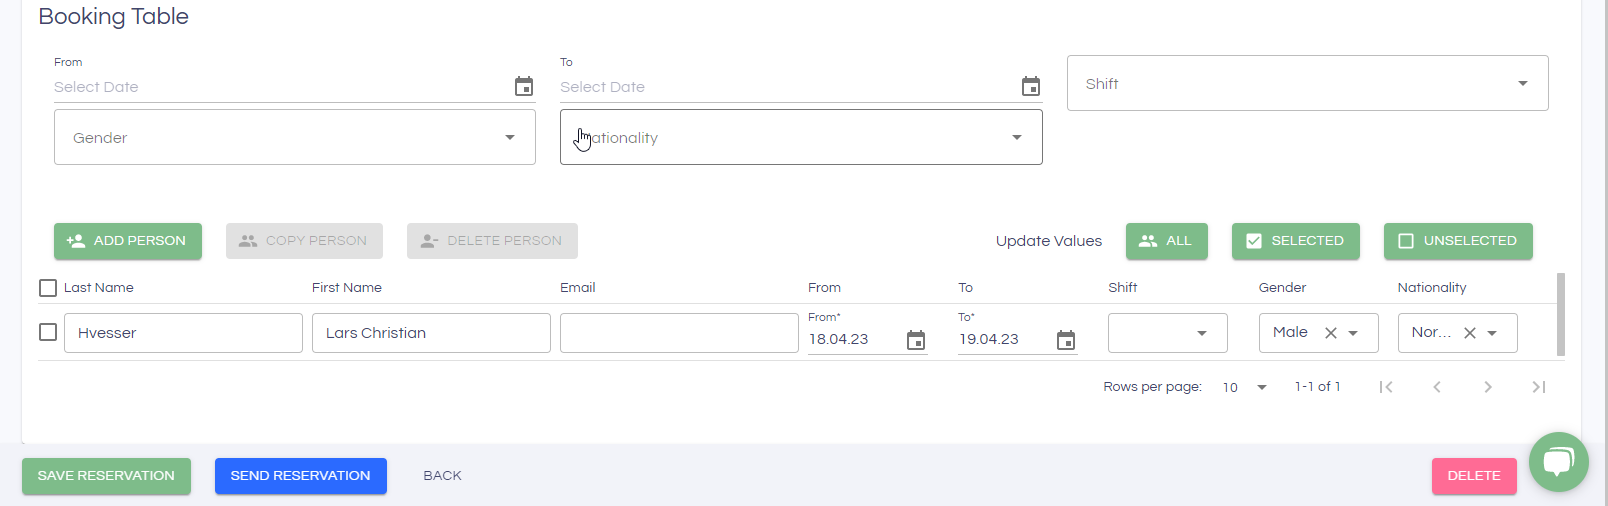
Validations are performed to be sure that you filled up the form correctly when clicking Save or Send. If you have some errors, the system will tell you with a red field. like the second picture below.
Send reservation
When the reservation is finished, click the Send Reservation button to send it to the selected site. The reservation must have at least one person in the Booking Table before sending it.
Editing/deleting reservations.
Note [Only open reservations can be edited or deleted]
To edit existing open reservations click edit button 
