Group booking
Overview
When a new group booking has been created, the view below is used to edit the group booking. A group booking is an effective way of working with multiple single bookings at a time. Also, each single booking can be managed separately if required.
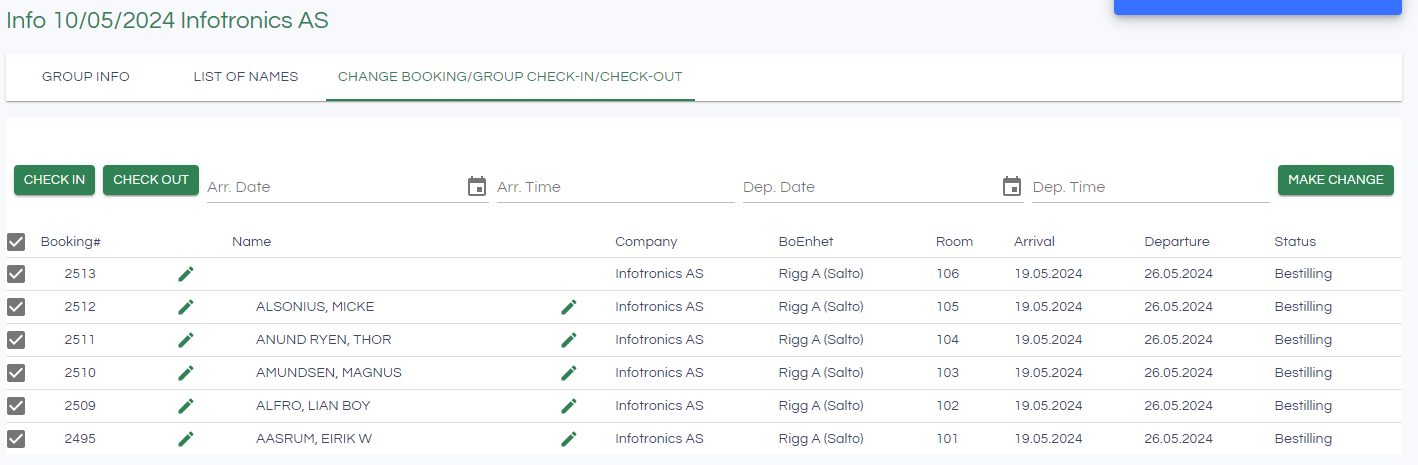
There are 3 tabs in the Group booking view, Group info, List of Names and Change booking/Group check-in/check-out
Group info
In Group info, general information about the group booking is entered. When information is changed and Save is clicked, you will be asked if you want to update the information on each of the related bookings as well.
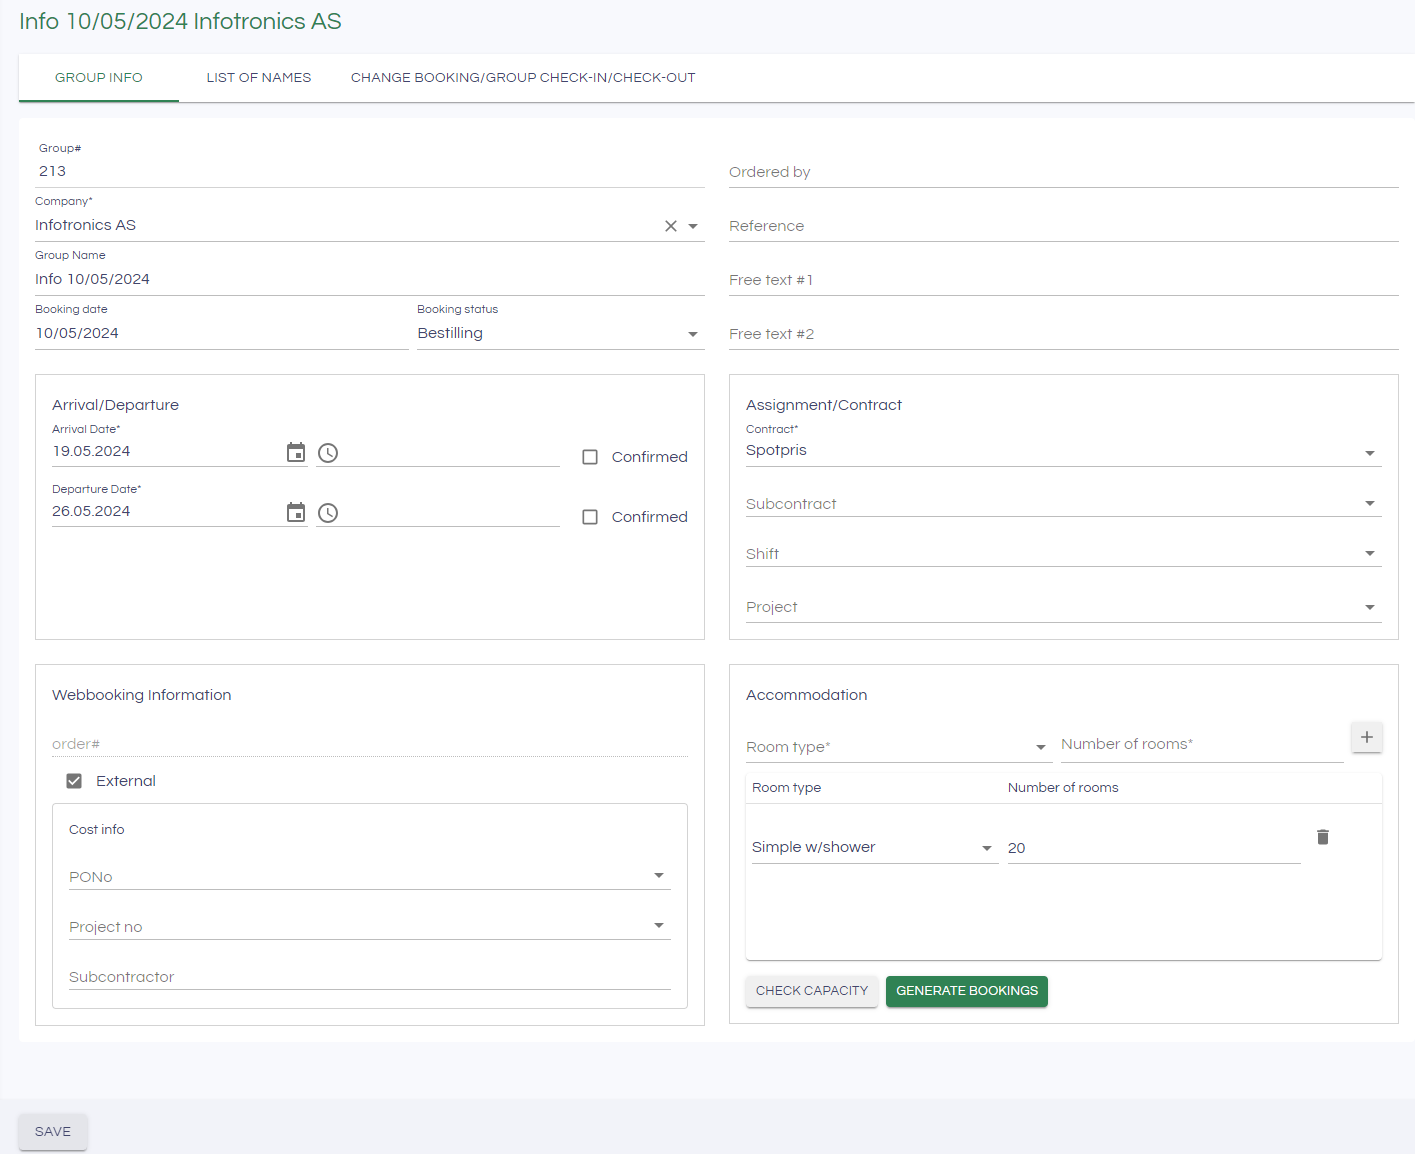
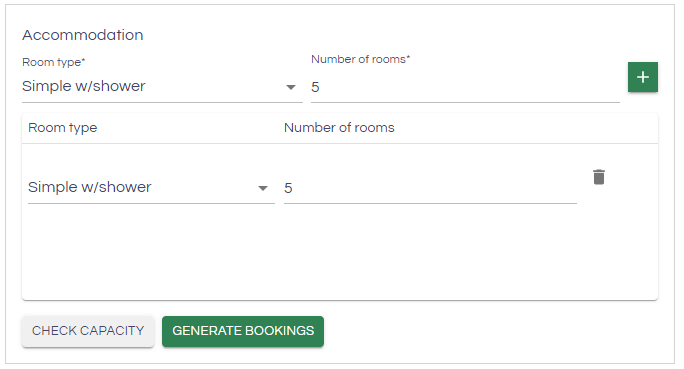
In the bottom right-hand area of Accomodation, the types and number of rooms required for the group booking is shown. When the group booking is created, the single bookings for the room type and number are automatically created (20 rooms of type Simple w/shower in the above screenshots). If more rooms are neded, select Room type and Number of rooms and click the "+" - button. Then click Generate bookings to create the bookings for the additional rooms.
Check capacity can be used to get an overview of the capacity in the camp before generating the bookings.
List of names
The List of names tab is used to allocate rooms and guests on the group booking.
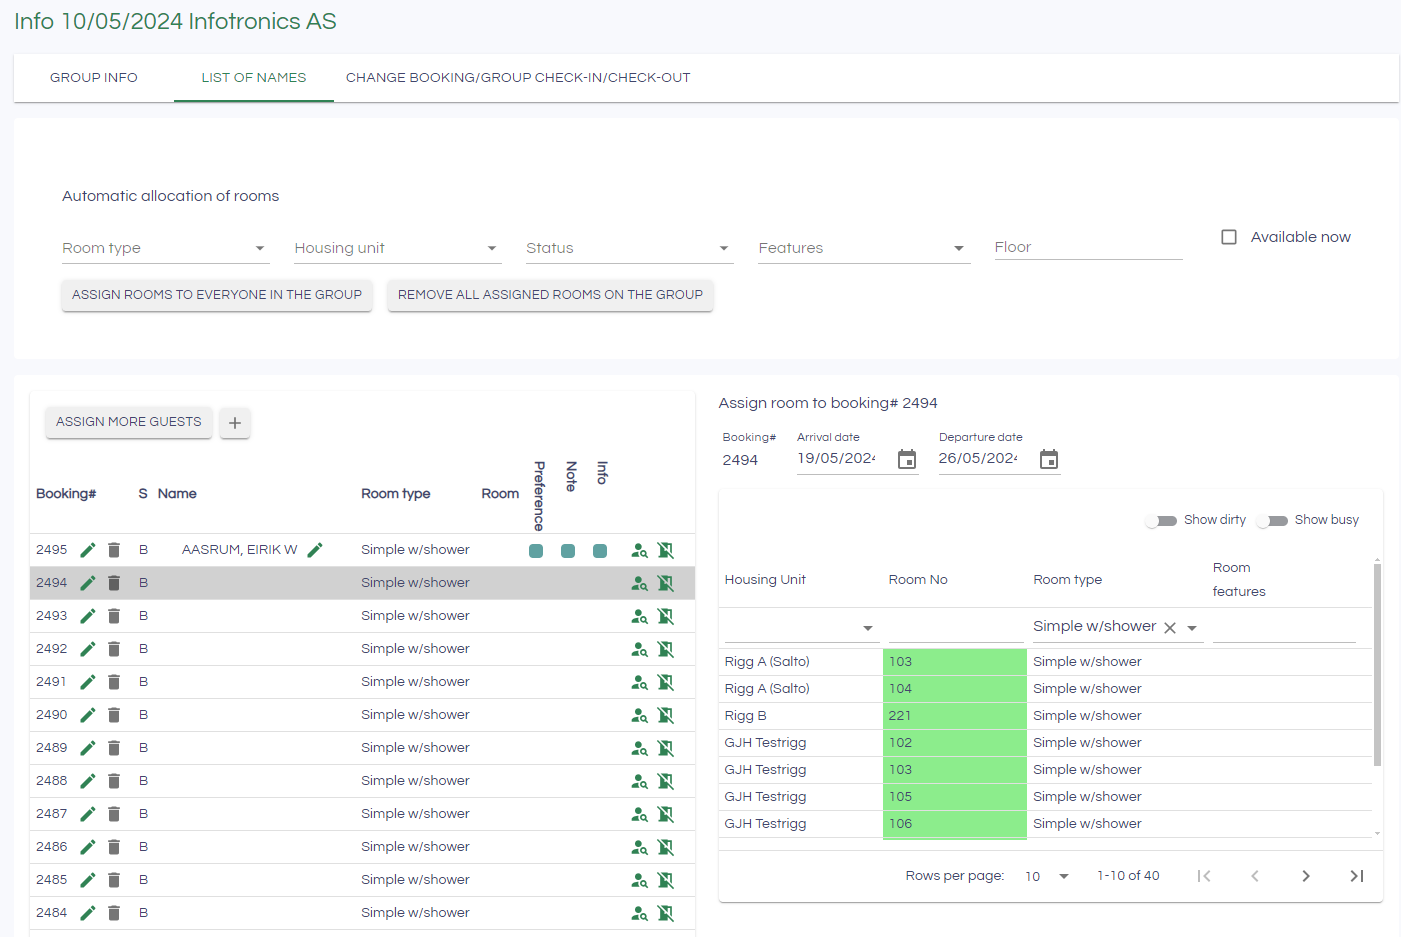
There are 2 ways to assign rooms and guests to the bookings of the group: Manual allocation or auto-allocation:
Auto-allocation
- Fill in any necessary features you have for the rooms to be allocated (room type. housing unit, current status of the room, and floor, if the room to be allocated must be available now).
- Click on "Assign rooms to everyone in the group"
Rooms will now be assigned for all bookings in the group that do not already have a room. You do not need to click save when automatically assigning rooms.

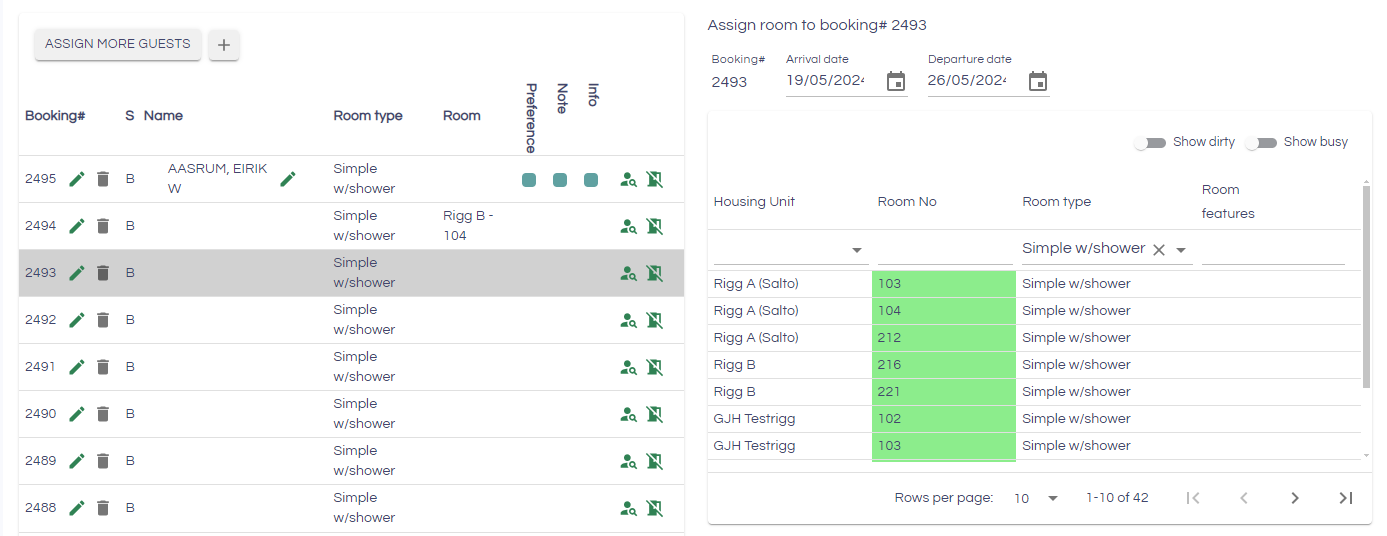
Manual allocation of rooms
For each booking on the left-hand side, a room is allocated from the available room list on the right hand side. Select the booking (shown in grey below), and click the room you want to allocate to the booking:
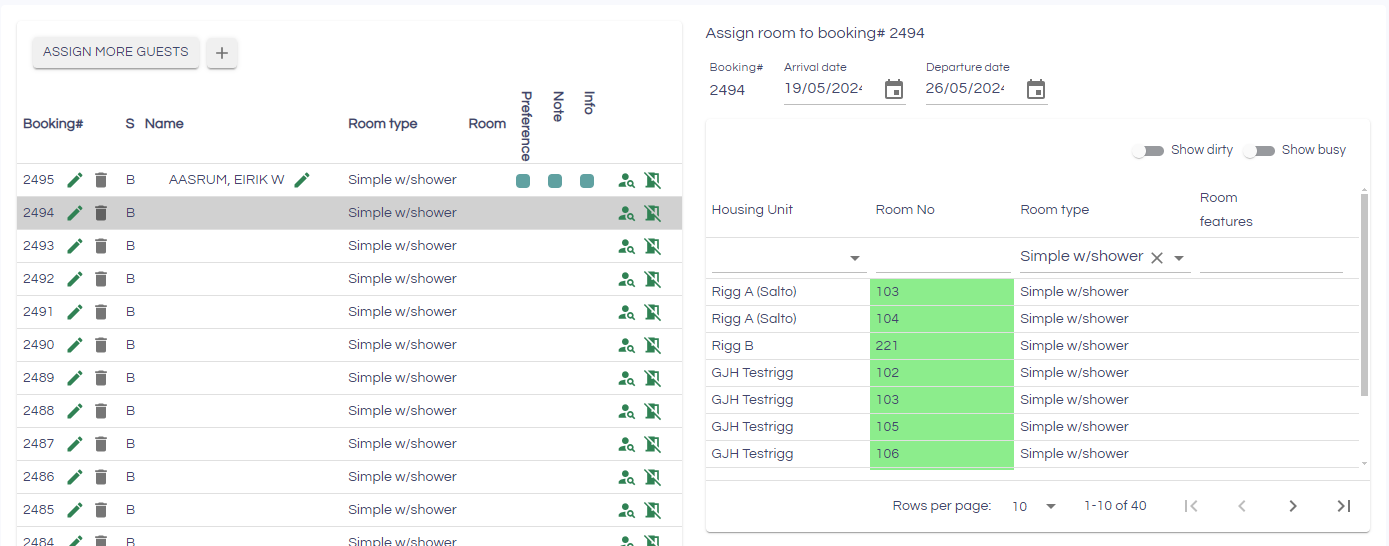
The booking is updated with the room, and the next room is automatically selected. The next room can then be allocated immediately by clicking it.
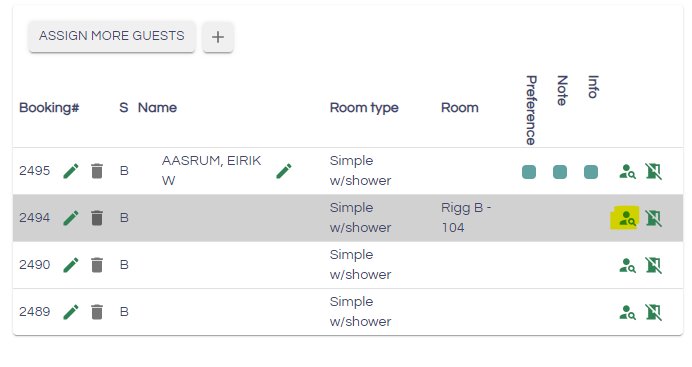
Assign guest to booking
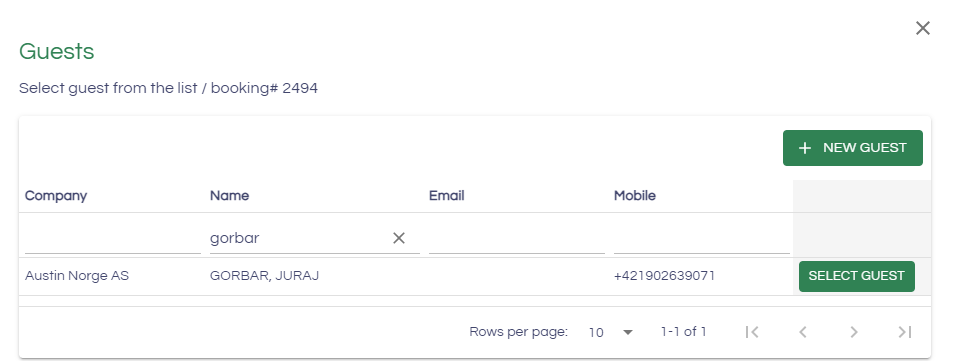
To assign a guest to the booking, press the icon of a person in the booking list.

Find the guest you want to assign to the booking and press "select guest". Press Save to confirm the changes.
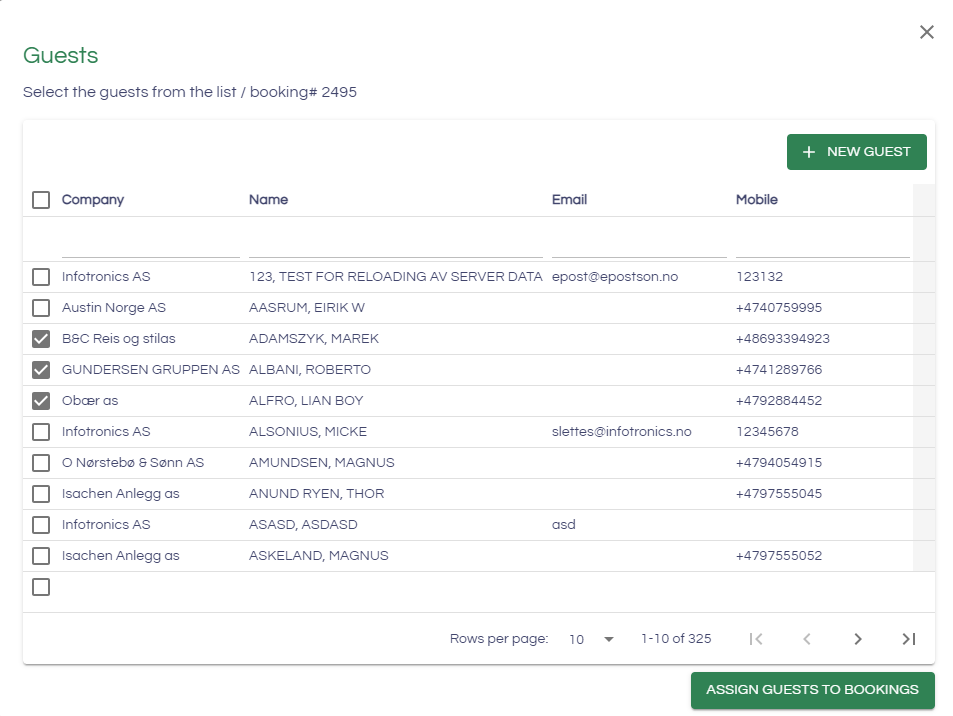
Assign multiple guests
Press "Assign multiple guests" which will bring up the guest list. Search and select all the guests you want to assign to the bookings. Press "Assign guests to bookings". The guests will be assigned and the changes will be saved automatically.
Masse Innsjekk/Utsjekk av gruppebooking.
You can check in all or some of the guests through the group booking.
Under this tab, you can change the arrival date, arrival time, departure date and departure time.
There are some rules that apply to changes of arrival and departure and check-in/check-out.
- Changed arrival date/time will only affect bookings with status Booked. A changed departure date/time will only affect bookings that are Booked, Checked in and On leave.
- You can only check in guests who have been assigned a room, arrival information and with status Booked.
- You can only check out guests who have their departure date and time filled in and who have the status of checked-in.
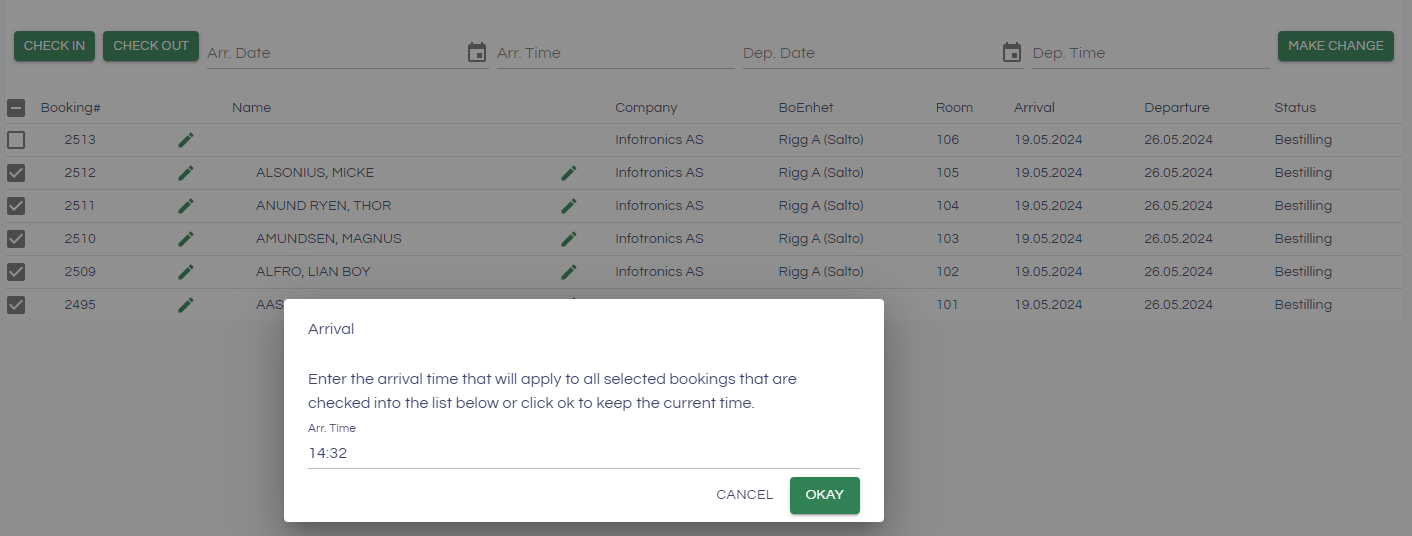
Check in
When you click Check-in, you will get a dialog to set the arrival time, the arrival date will be set to today's date. Press save to confirm the changes.
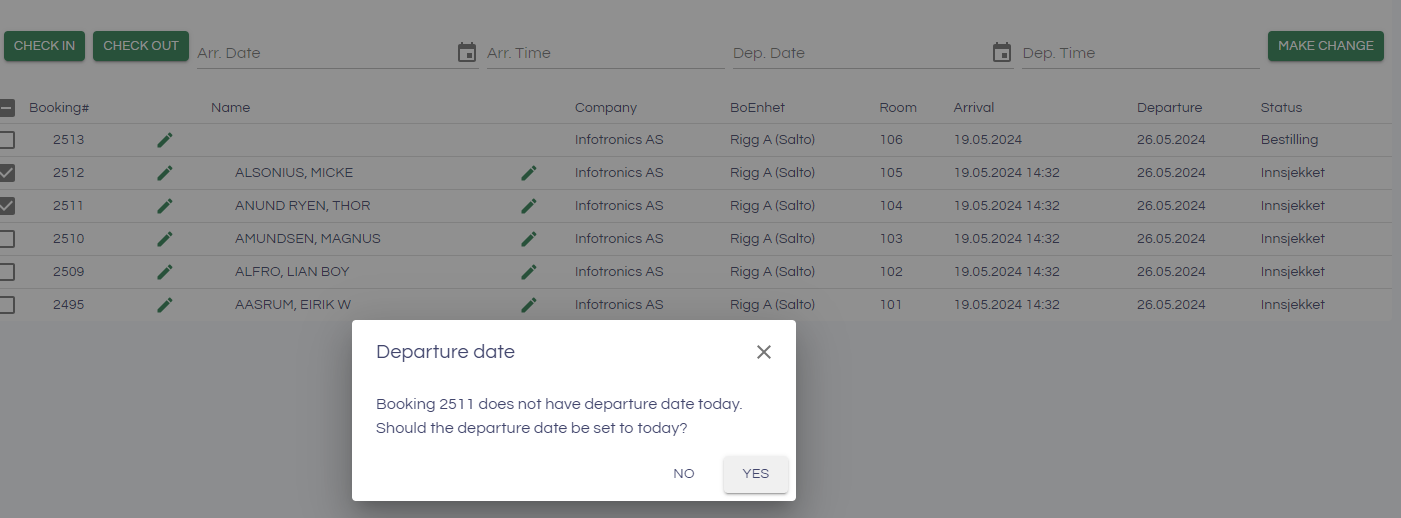
Check out
Click "Check out" and select the departure time that will apply to all the bookings in the group that has checked in as status.
Click OK in the dialog when you have chosen a departure time. You will get a dialog per booking that does not have a departure on today's date. You will then be given the choice between keeping the given departure date or changing it to today's date.
Press Save to confirm the checkout
Bulk edit
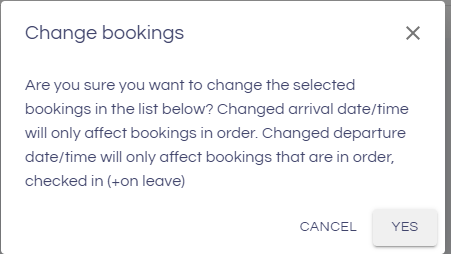
It is possible to edit arrival date/time and departure date/time on the bookings in the group booking. Enter the new information in the fields as shown below, and click Change data to perform the change:
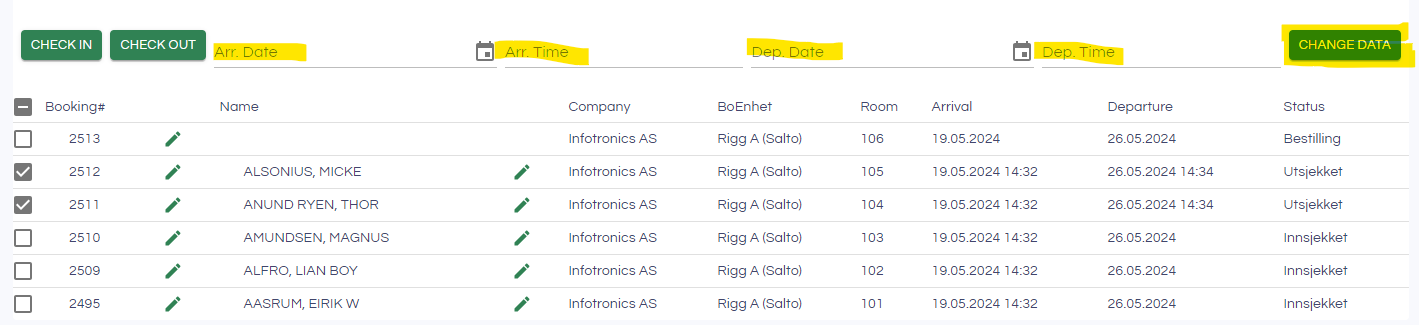
You will get a dialog asking you if you want to change the information on all the bookings in the group. Select "Yes" for the changes to apply to all bookings, no to only change the group booking. Click Save to confirm the changes.